


Microsoft provides users with several ways to select Service Pack 1 (SP1) patch updates for Windows 7 and Windows Server 2008 R2. The Windows 7 SP1 package provides the latest enhancements to the Windows OS operating system by including previously deployed updates through Windows Update along with incremental updates (only updating what is new, has changed) for the Windows 7 platform.
Follow the steps below to install or uninstall Service Pack 1:
Install Service Pack 1 to Windows 7
1. Check Disk space
Disk space requirements
x86-based (32-bit): 4100 MB
x64-based (64-bit): 7400 MB
2. Download Service Pack 1
Access this link to download SP1 for Windows 7
3. Install
– After you finish downloading SP1, mount this file to disk and double-click .exe file then follow the instructions to install SP1. The computer may restart several times during installation.
– After installing SP1, log in to your PC. You might see a notification that the update was successful.
4. Regain disk space when installing SP1:
During the installation of SP1 for Windows 7, the system creates a backup of the components needed to recover when the installation process fails. If the installation succeeds, you can restore the capacity of occupied components on the system by the following:
– Type “Disk Cleanup” in the search box on the Start menu then press Enter. In the interface that appears, click the button Clean up system files then Yes.
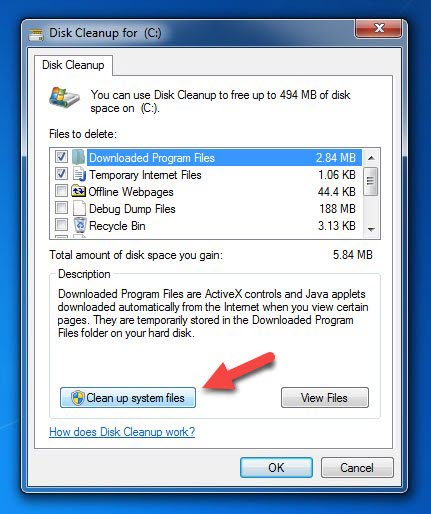
– You will find Service Pack Backup Files in the list, select it and then click the OK button.
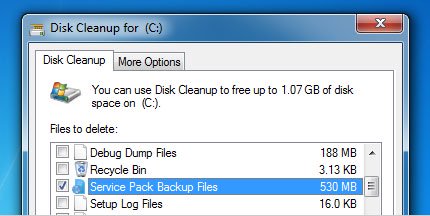
– You just need to wait when the cleaning process is completed and then check the disk space.
Uninstalling Service Pack 1 from Windows 7:
If you notice that a hardware device or an installation program has problems after installing the SP1 patch, or simply wants to remove SP1 from Windows 7, simply follow the instructions below:
– Open Control Panel and click Programs -> Uninstall a program. Now click on the View installed updates link given in the left sidebar.
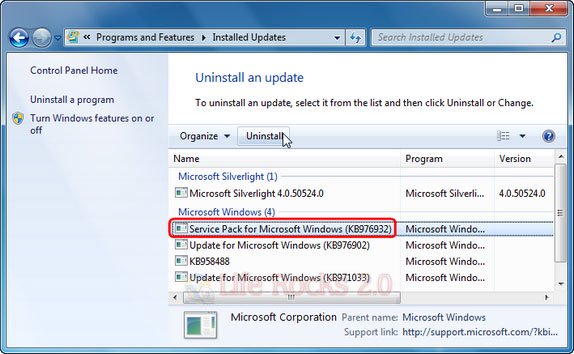
– An update of SP1 called Service Pack for Microsoft Windows you found in the list given and click the Uninstall button on the toolbar to remove. You can also right-click the update package and select Uninstall.
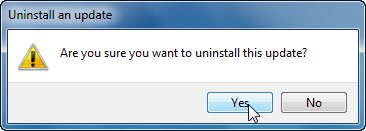
– A dialog box appears, click Yes to confirm the removal. After the uninstall is complete, you will need to restart the computer.


Facebook Comments